How to Create Retail Shelf Inventory from Photos
Whether you manage a single retail store or a chain of locations, shelf inventory audits are a necessary but time-consuming task. Walking every aisle, counting products, and entering data into a spreadsheet can take an entire workday — and by the time you're done, the data is already slightly out of date.
This guide covers how to do retail shelf inventory more efficiently, including a modern approach using photo extraction that reduces the manual work by 80–90%.
What is a shelf inventory audit?
A shelf inventory audit involves documenting everything on your shelves: product names, brands, quantities, prices, and placement. The goal is to:
- Know exactly what stock you have on hand
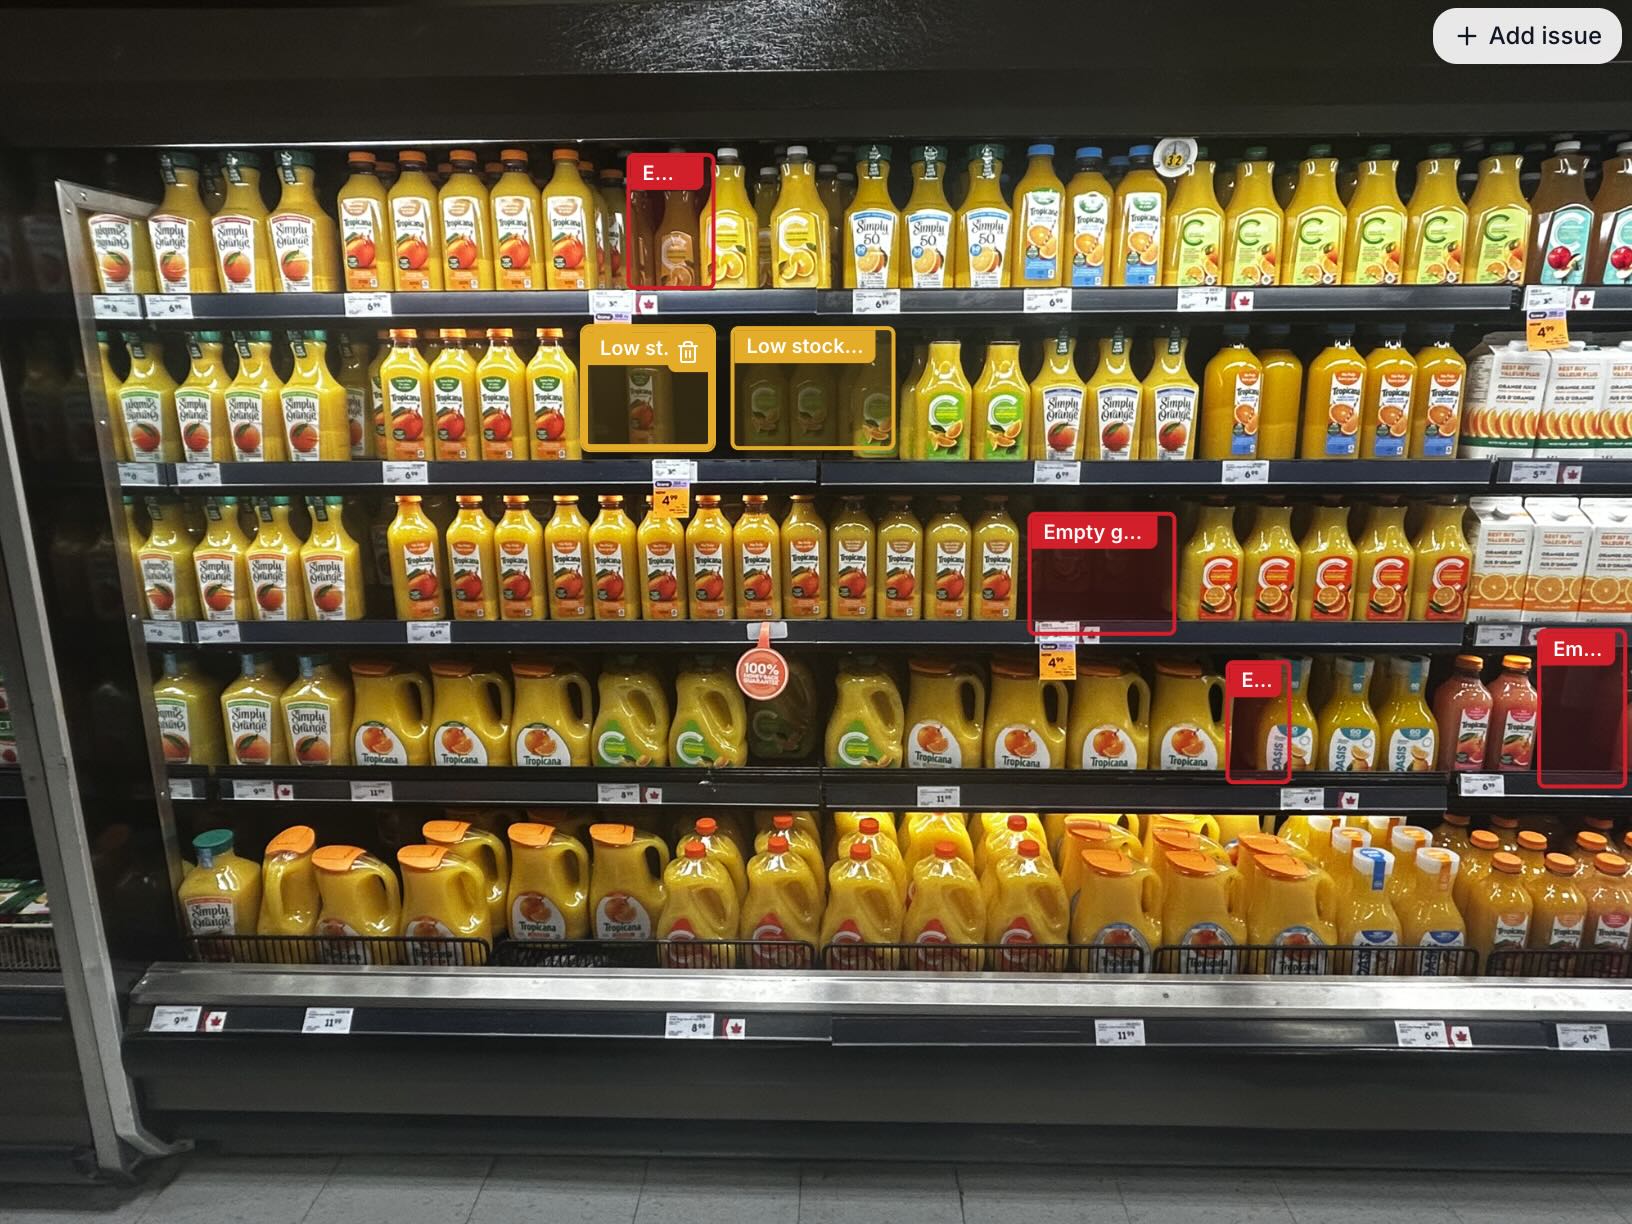
- Identify out-of-stock or low-stock products before they cause lost sales
- Verify that planogram. compliance is maintained
- Generate data for purchasing and reorder decisions
The traditional approach and its problems
Most store managers still do this manually:
- Walk the aisle with a clipboard or tablet
- Read each product label
- Count units and record them
- Enter data into a spreadsheet back at the desk
This works, but the problems are well known:
- It takes hours — a medium-size store can take 4–8 hours per full audit
- Transcription errors — manually copying product names leads to inconsistencies
- It disrupts store operations — staff can't serve customers while doing audits
- Infrequent updates — because it's so time-consuming, audits happen monthly or quarterly at best
A faster approach: photograph your shelves, extract the data
The idea is simple: instead of reading and typing every product, you photograph the shelves and let AI extract the structured data from the images.
Here's the workflow:
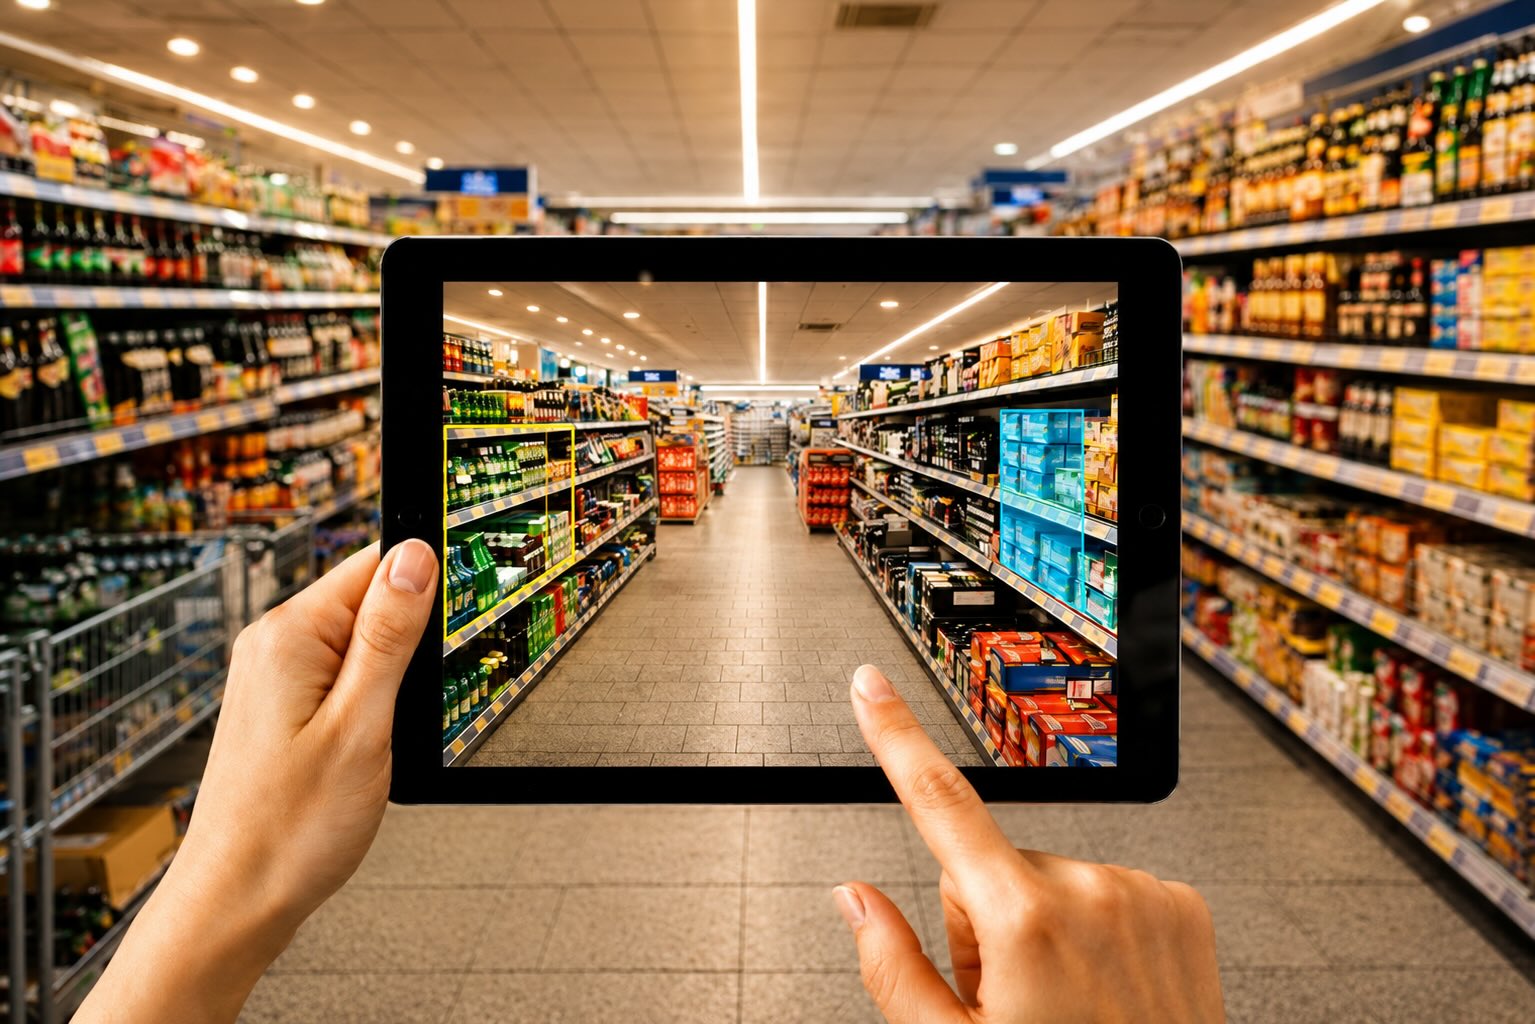
Step 1 — Photograph each shelf section
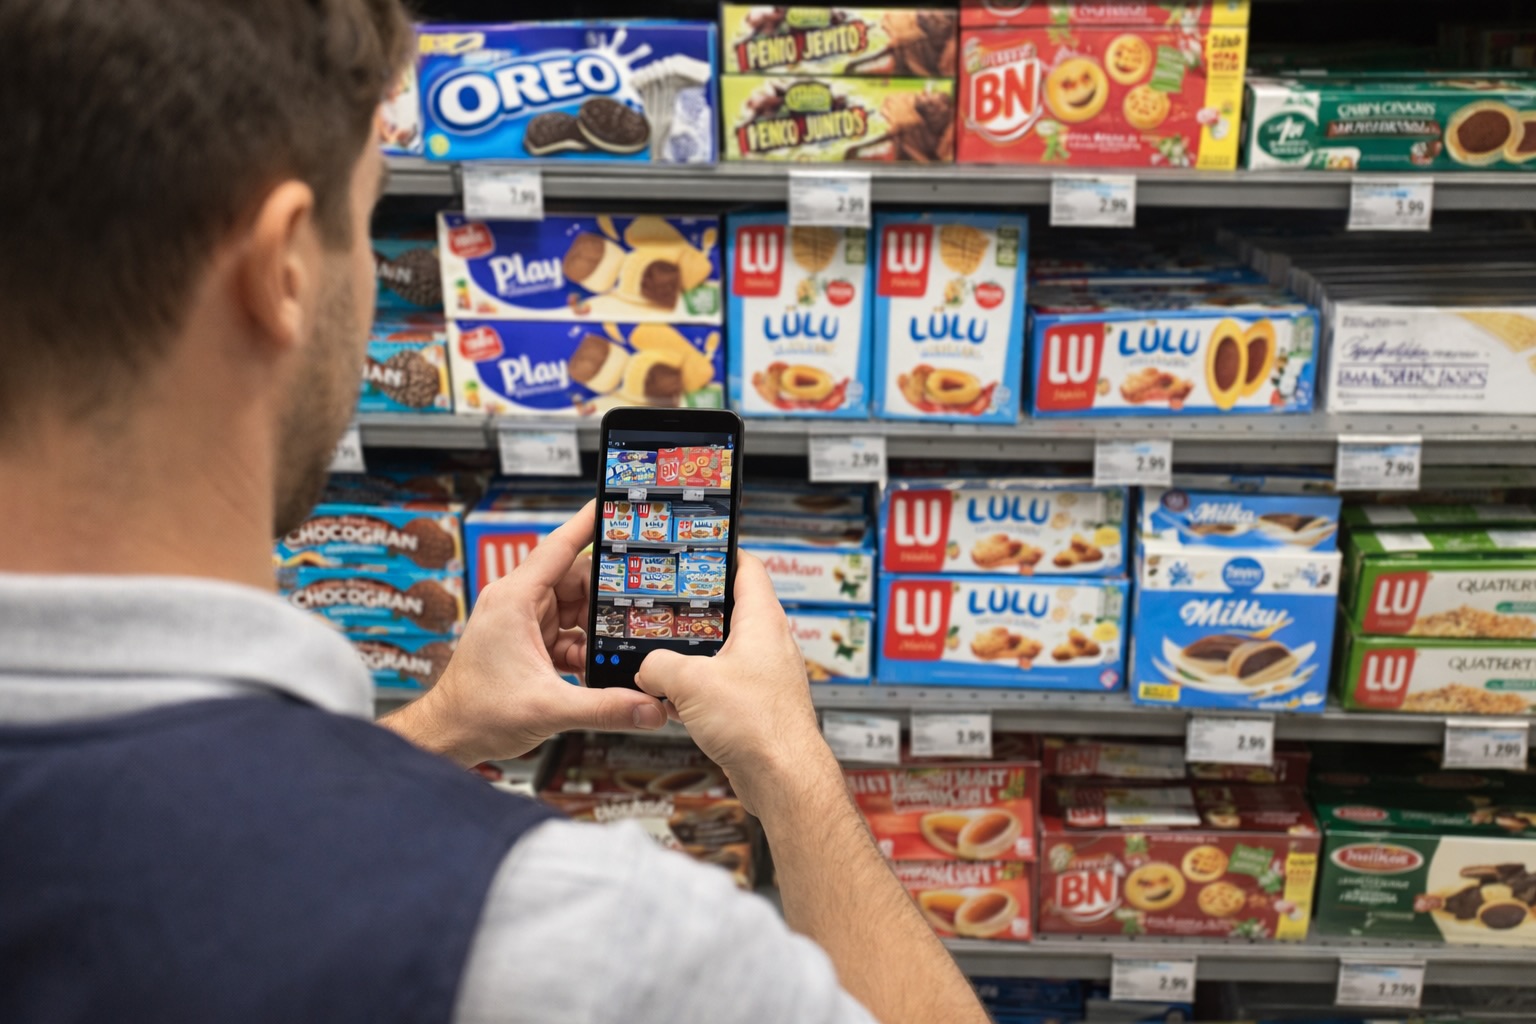
Walk the aisle with your phone and take photos of each shelf section. Aim for:
- One photo per shelf bay (usually 3–5 feet wide)
- Straight-on angle so labels are fully visible
- Good lighting — use your phone's flash if the aisle is dark
You don't need professional equipment. A modern smartphone takes photos more than sharp enough for AI extraction.
How many photos? A typical aisle requires 15–30 photos. A full store can be photographed in 20–40 minutes by one person.
Step 2 — Upload photos in batches
Upload your photos to Extractify. You can upload multiple images at once.
Step 3 — Define what to extract
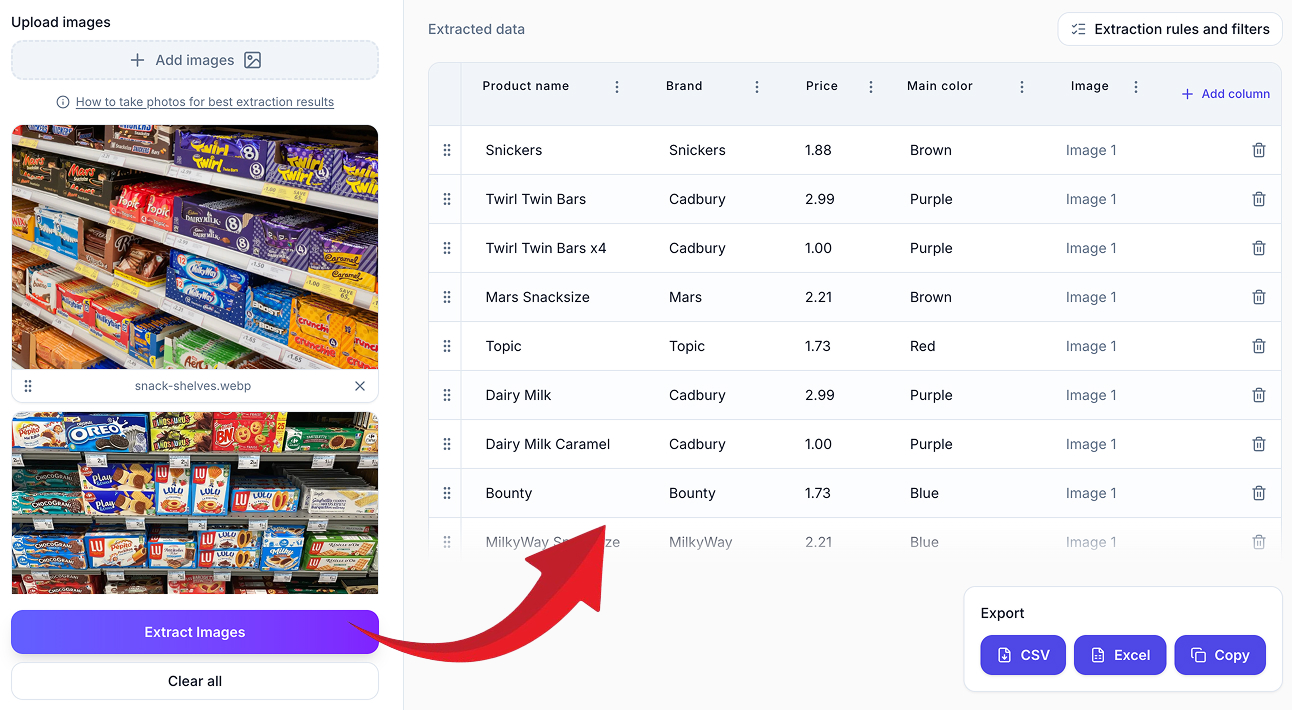
You tell the system what columns to populate. For a shelf inventory, typical columns are:
- Product name
- Brand
- Price
- Quantity / facing count
- Image number (for location reference)
You can add custom columns for anything visible on the label — SKU, size, weight, category.
Step 4 — Review and export
The extracted data appears in a spreadsheet-style table. Review, make any corrections, then export to CSV or Excel with one click.
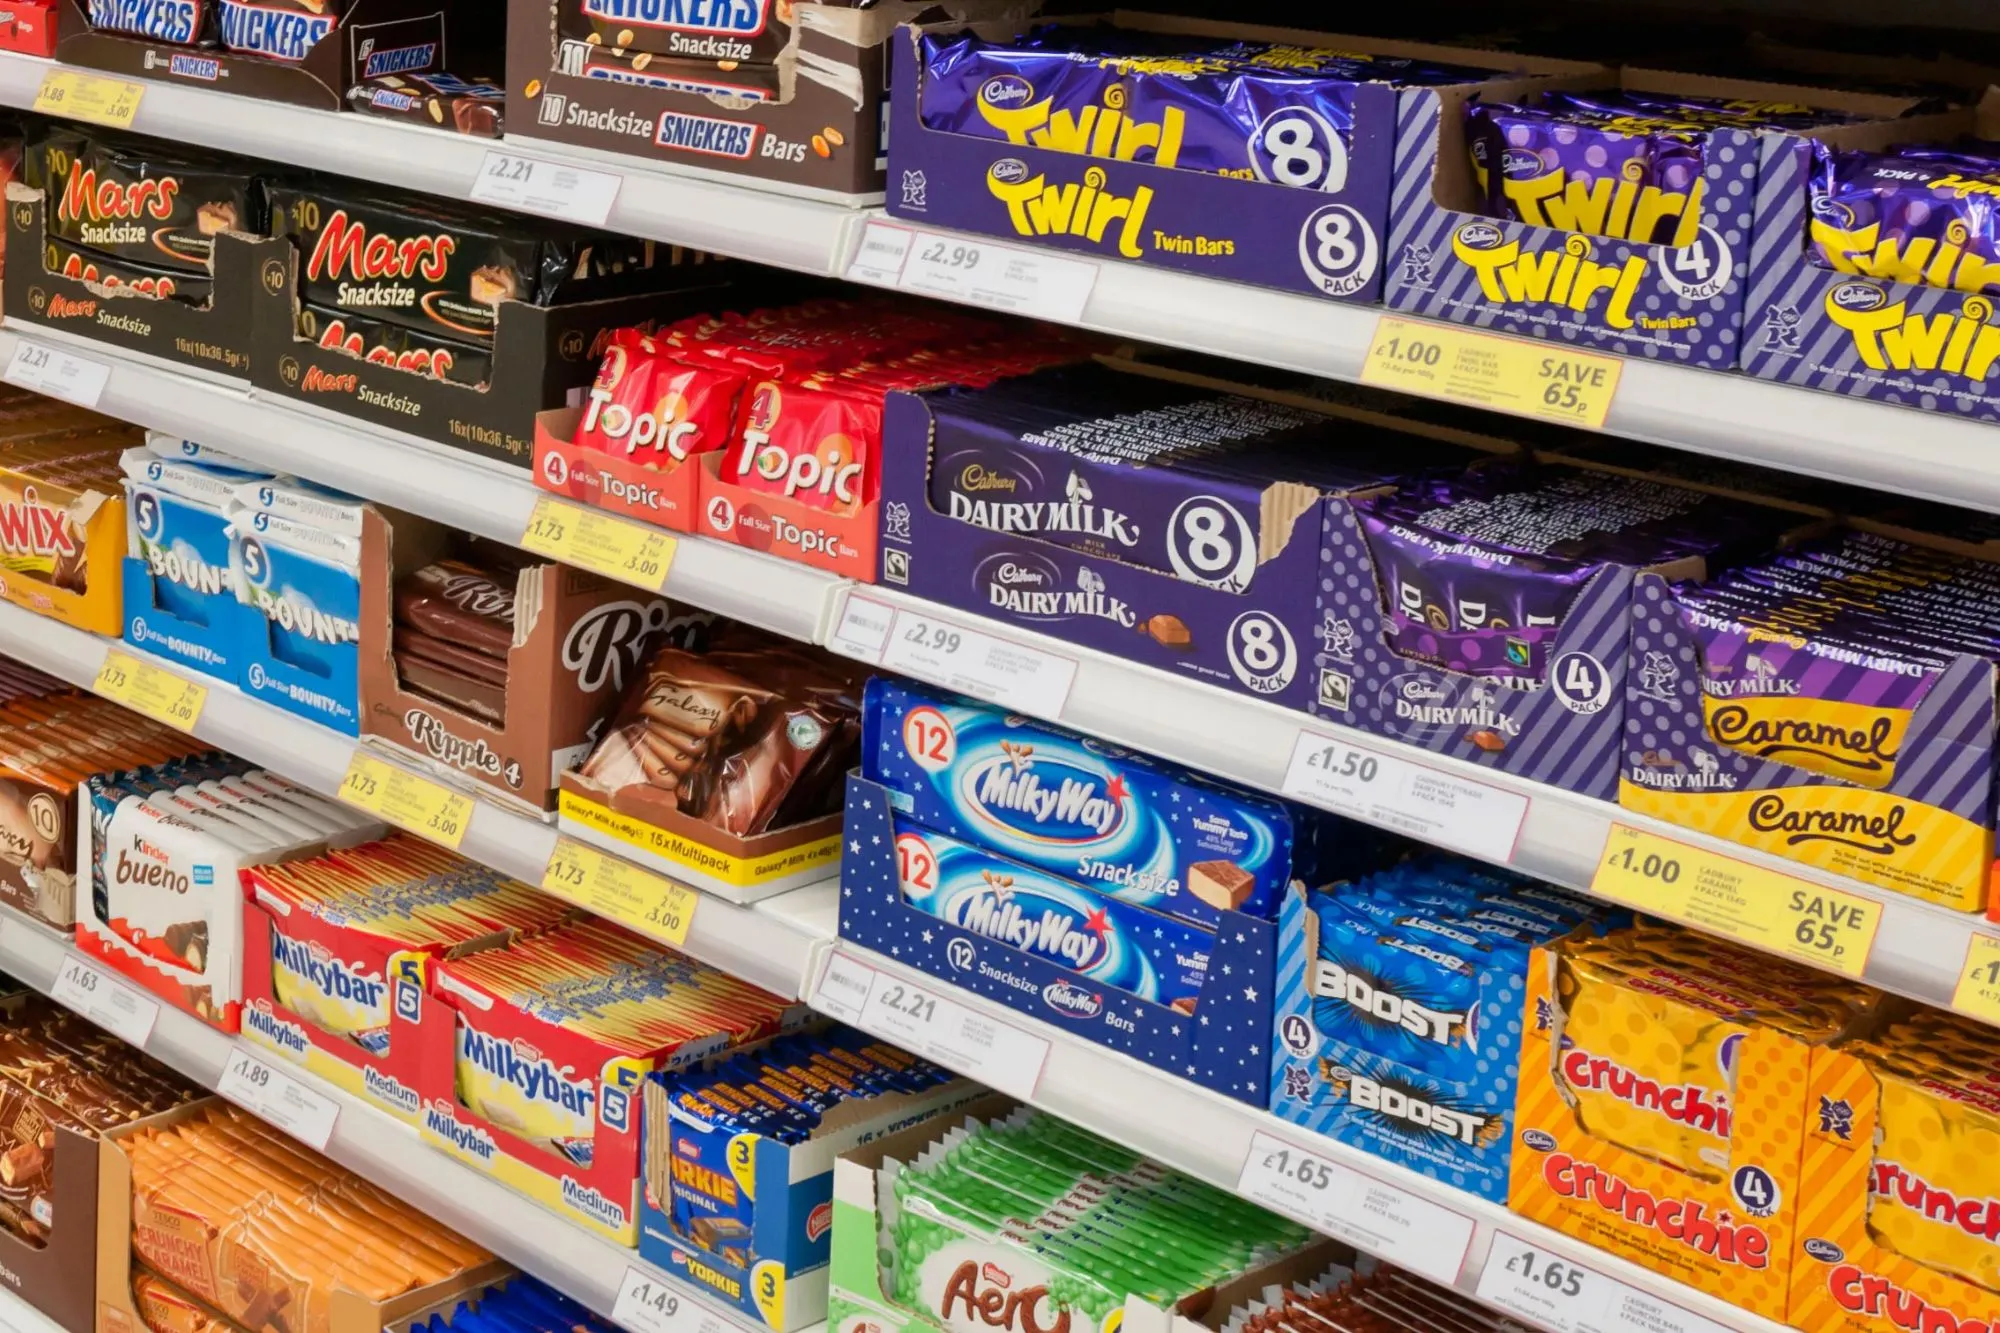
What information can you extract from shelf photos?
From clear shelf photos, you can typically extract:
- Product names — brand + product variant (e.g., "Heinz Ketchup Original 500ml")
- Prices — from shelf labels or price tags
- Brands — reliably identified from logos and packaging
- SKUs — when visible on shelf edge labels
- Category — inferred from product type
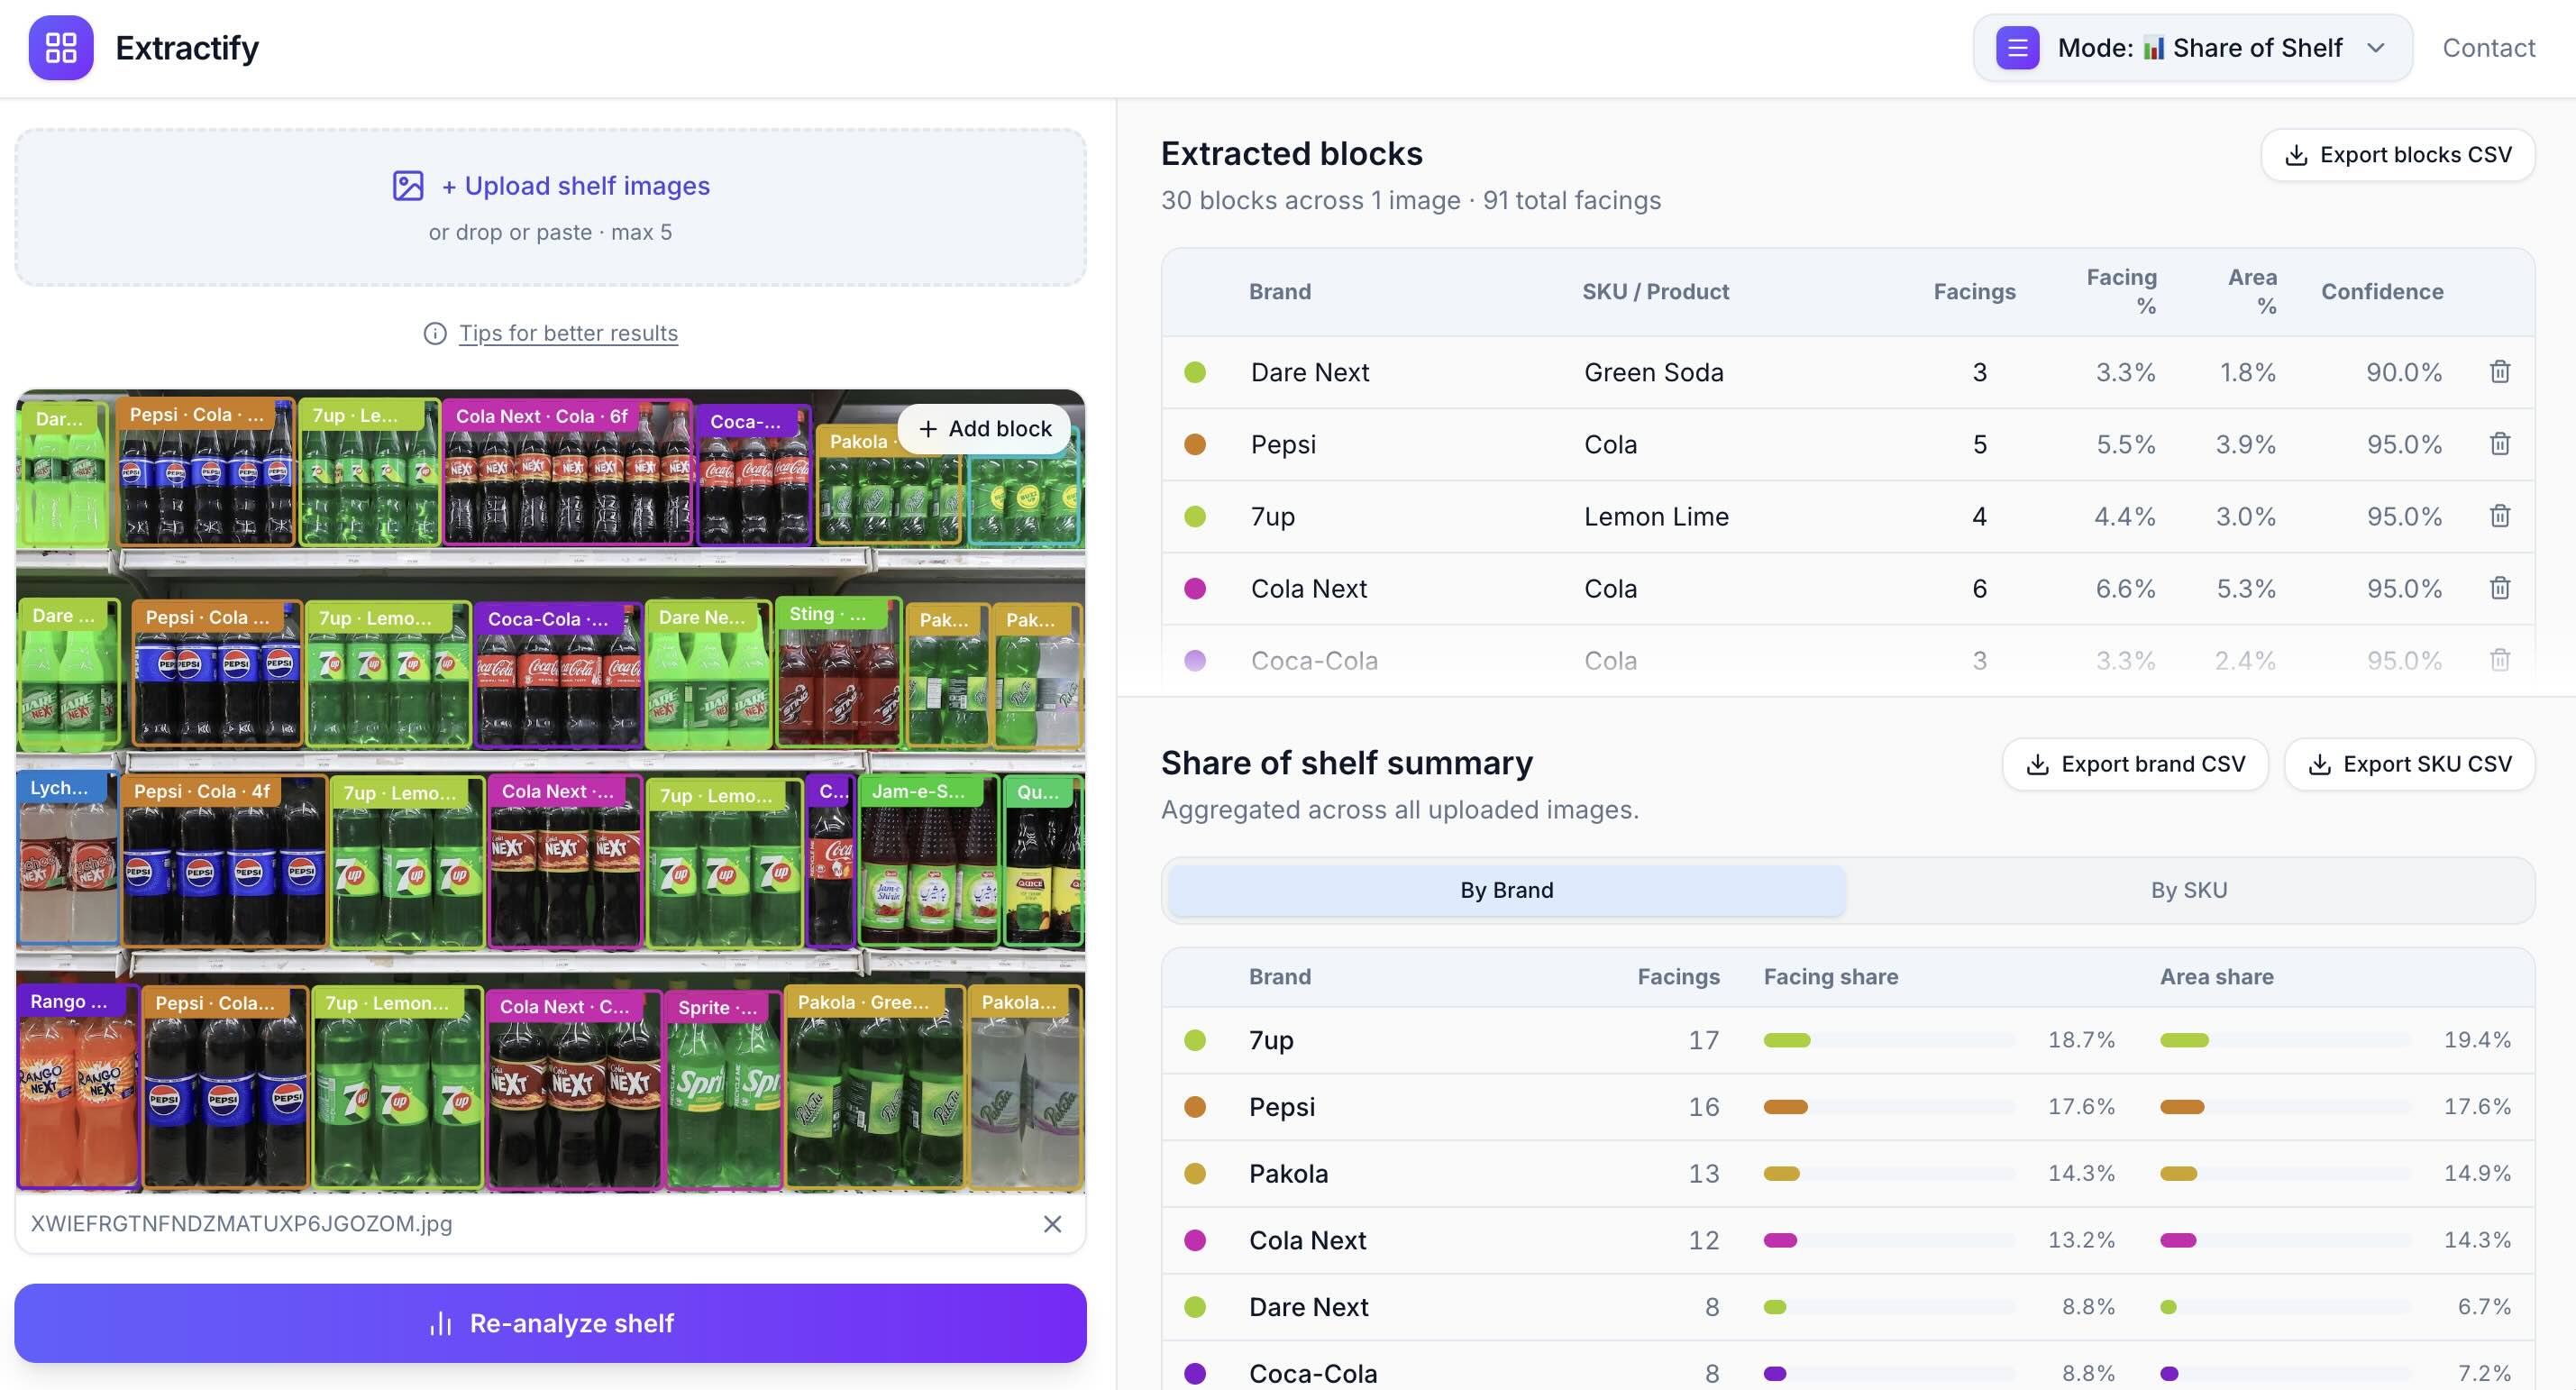
- Facing counts — with a clear photo showing the full shelf. For merchandising reviews, those same counts can help you calculate share of shelf from store photos.
What you generally cannot extract from photos:
- Stock in the back room
- Precise weight/volume unless printed large on the label
- Barcode numbers (need a barcode scanner for that)
Tips for best results
Photography tips:
- Shoot at shelf height, not from above or below
- Avoid shooting into strong backlighting from windows
- Get close enough that product names are clearly legible (test by zooming in on your phone)
- Take multiple photos for wide shelves rather than one wide-angle shot
Extraction tips:
- Upload images in aisle order so the "Image N" column reflects shelf location
- Add a "Shelf section" column to your template and fill it in after extraction
- For stores with consistent planogram, reuse the same column template each audit
Using the spreadsheet for inventory management
Once you have your data exported, here's what you can do with it:
- Compare to your planogram. — filter by category and check facing counts
- Generate a reorder list — sort by quantity to identify low-stock items
- Track changes over time — compare this audit's data to last month's
- Share with suppliers — give vendors a category-specific slice of your data
- Import into your POS or ERP — most systems accept CSV imports
How often should you do shelf audits?
With a fast photo-based approach, audits are no longer a once-a-month burden. Many retailers using this method do:
- Full store audits once a week or bi-weekly
- Category audits daily for high-velocity sections (beverages, snacks, etc.)
- Pre-promotion audits before a sale or campaign to verify stock levels
The faster the process, the more frequently you can use it — which means better stock availability and fewer lost sales.
Summary
Retail shelf inventory doesn't have to take a full day. By photographing your shelves and using AI extraction, you can turn a 6-hour audit into a 1–2 hour task that one person can do without disrupting store operations. The resulting spreadsheet is immediately actionable for reordering, planogram compliance, and supplier reporting.